There many ways to set stones including; bezels (hand-fabricated or pre-made), claws, flush set, tension set, channel, etc. but knowing how to set your stones in hand-fabricated bezels is an essential technique in metalsmithing. This technique is not difficult, but understanding the steps involved and practice practice practice will make you a skilled setter.
This Blog Post focuses on setting Cabochon stones (not faceted stones) on flat backplates (sheet) and can be used when making pendants, rings, and earrings. We strongly recommend that you take a bezel setting class (either in person or online), because this Blog will give you lots of information, but not everything you need to know.
Bezel Wire: comes in various heights, gauges, designs, and metals. Standard bezel wire is made with FINE SILVER and comes in the following edges: Flat, Scalloped, and Serrated. Flat bezel wire also comes in sterling silver. Also in sterling silver are the Gallery bezel wires. Workingsilver.com sells fine silver bezel wire in 28gauge (.321mm thick) in flat, scalloped, and serrated, and sterling silver gallery wires in: Crown, Inverted Heart, and Swag. Bezel wire is also available in copper.
Here are some pictures of a variety of bezel wires available at Workingsilver.com:
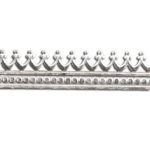
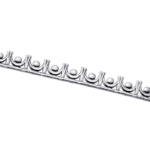
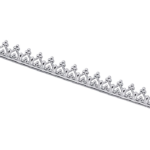
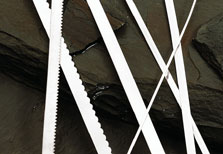

Fine silver and copper bezel come in a variety of heights. Workingsilver.com sells the standard heights of 3mm and 5mm, which will work with most stones.
NOTE: fine silver bezel wire has an inside and an outside. The inside of the wire has a very small ridge along each edge almost making the wire concave, and the front of the bezel wire is very smooth and flat.
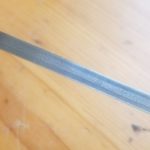 Inside
 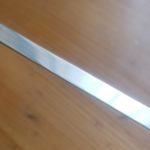 Outside
HOW TO MAKE THE BEZEL (again, we are focusing on setting a stone on a flat backplate).
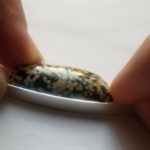
Determine the height of the bezel wire needed. WITH THE STONE ON A FLAT SURFACE, look at the wire against the stone. You want the bezel wire to come up on the stone just past the shoulder of the stone, as shown in this picture. See how the cabochon stone starts to round to the top and get smaller after the shoulder? This allows you to push the bezel wire onto the stone to hold it securely in place, making it a functional, rather than decorative bezel.
Measure your stone and use the formulas below for Round, Oval and Square stones. If your stone is “free form” you will need to determine the length of bezel wire needed. One way to do this is to push the wire around the stone with your fingers and mark it so that you cut the correct length of wire. We will show pictures of doing this after the formulas.
These formulas are based on using 28gauge bezel wire, which is .321 thick
Round Stones: (diameter of stone + bezel thickness) x 3.14 (pi) = length of wire needed
e.g. (4mm+.321mm) x 3.14 – 13.5mm The wire needed for a 4mm round stone is 13.57mm long. If you were cutting sterling silver bezel, you would but this to 14mm, but Fine Silver is very soft and stretches fairly easily, so I recommend cutting your bezel wire to 13mm, then stretching it on the round bezel mandrel as you are shaping it round.
Oval Stones: (length of stone + width divided by 2) +.321 x 3.14 = length of wire needed
e.g. 5mm + 7mm divided by 2 = 6mm + .321mm x 3.14 = 19.85mm
Square Stones: (length of 1 side x 4) + .5 = length of wire needed
e.g. (4mm x 4) + .5 = 16.5mm
Rectangular Stones: (length x 2) + (width x 2) + .5 = length of wire needed
e.g. (5mm x 2) + (7mm x 2) + .5 = 24.5mm
FREE FORM STONES: with stone sitting on a flat surface! tightly push the bezel around the stone, overlap the ends, and mark where to flush cut
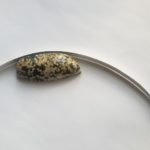

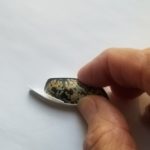
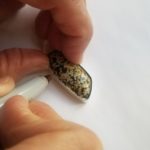
Another way of measuring the length of wire to cut for a Free Form stone is to use a thin strip of painters tape around the base of the stone.
FOR ALL SHAPES OF STONES:
- Always cut the ends of bezel wire with good flush cutters – if the wire is not flush cut, it will have a bevel on the end, and the join will always be noticeable.
- File the ends of the bezel wire square and fit them together until no light is coming through the join.
- Give the ends of the wire a gentle pinch with flat pliers on the join – this gives you a nice flat spot and tight-fitting seam for soldering. After pinching, again check that the ends are in tight contact.
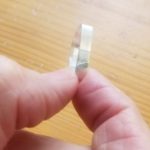
- Solder using flux and HARD solder. Place the bezel wire on the solder block on 1 edge, with the join facing you (this is different than soldering a ring shank). Place a tiny piece of hard solder UNDER the join (so there is solder under both sides of the join), gently spray the join with liquid flux. Heat with a small torch flame, and the instant the solder pulls up the join take the flame off the bezel – bezel wire melts quickly!! Make sure the solder has pulled up the entire length of the join. Pickle, rinse
- GENTLY shape the bezel wire with a small rawhide mallet on the shape of the bezel mandrel you need based on the shape of your stone (or for a Free Form Stone, shape on a round ring mandrel). Remember to flip it over and form on the mandrel again so that you’re not making a conal shape bezel.
- Fit the bezel over stone. Remove it, flip it over and fit it again on the stone. If it’s too small, put it back on the mandrel and hit it harder with the rawhide mallet to stretch the metal – go SLOW – you don’t want to over stretch it. If it’s too big, cut it, re-measure, solder, and shape again. The correct fit of the bezel on the stone should be that you can pick up the bezel without also picking up the stone, BUT when looking straight down on the bezel around the stone, you don’t see much if any space between the stone and the bezel wire.
SOLDERING THE BEZEL ONTO THE FLAT BACKPLATE (SHEET): Once the bezel fits the stone;
- Place the sterling sheet on a solder block or tri-pod. I prefer to use a tri-pod for this soldering job, because I can direct most of the heat underneath on the sheet instead of on the bezel wire. Solder flows based on the heat of the metal, and the sheet has to be heated much much more than the bezel wire. It’s easy to melt the bezel wire with the torch flame. (Picture of tri-pod below)
- Place the bezel on the clean, flat, sterling back making sure the bezel and the sterling sheet are touching all the way around.
- With the bezel on the sterling sheet (flat back), spray with Aquiflux (picture below) and dry with the yellowtail of the torch (not too close – all you’re doing is drying the flux and you don’t want to overheat).
- Place small pieces of extra easy solder along the inside of the bezel. The solder pieces need to be touching the bezel wire and sheet and should be spaced a bit apart. Solder will flow to about three times its size, so judge how much space you leave between the pieces of solder. You want to make sure the solder will flow all around with no gaps.
 Aquiflux
 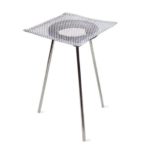 Tri-Pod
Once you’ve soldered the bezel onto the backplate, you’re ready to cut off extra backplate using a saw blade in a frame, unless your design is to have the backplate extend past the stone as with this ring.
Soldering a bezel onto a ring is a slightly different process, and I recommend that you take an in-person or online class to learn this technique.
Practice, Practice, Practice and you’ll love making bezels!!
